
Table of Contents
Find heat patterns before guessing at the repair
Thermal cameras reveal surface-temperature differences that ordinary sight misses. Around a home or homestead, those patterns can help you investigate insulation gaps, draft paths, radiant-floor problems, HVAC behavior, plumbing clues, motors, pumps, bearings, and safely visible electrical components.
The best thermal cameras aren’t simply the models with the most colorful screen or the highest resolution listed in the title. Native detector resolution, thermal sensitivity, focus, refresh rate, visible-camera context, connector compatibility, storage, reporting tools, and calibration support determine what the camera can do. The conditions during the scan matter just as much.
This guide compares five thermal cameras sold on Amazon, from a compact USB-C attachment to a professional FLIR handheld. It also explains what an infrared image can and cannot prove. Thermography is very good at finding patterns. Diagnosing the reason for those patterns still requires building knowledge, safe inspection, and sometimes another instrument.
What thermal cameras actually detect
Thermal cameras detect infrared radiation from a surface and convert the apparent temperature pattern into an image. The color palette is a display choice. Red does not always mean dangerous, blue does not always mean wet, and a dramatic rainbow does not turn a guess into a diagnosis.
DOE guidance on home energy assessments describes thermographic scanning as a way to detect temperature differences along walls, roofs, windows, and doors. Those differences can reveal where to investigate, especially when the scan is paired with a blower-door test, visual inspection, a moisture meter, electrical measurements, or equipment history.
FLIR’s explanation of thermal imaging through walls makes the key limitation clear: thermal cameras see the wall’s surface, not through ordinary walls. A stud, missing insulation, moving air, moisture, pipe, heating element, animal nest, or hot component may change that surface temperature enough to create a visible pattern, but the camera does not display the hidden object itself.
Glass is another trap. Long-wave infrared energy used by common building cameras does not pass through ordinary window glass the way visible light does. The screen often shows reflected heat, including a ghostly image of the operator. Polished metal can perform the same little parlor trick.
A temperature pattern needs context
A cold streak near a window may indicate incoming air, conductive heat loss, moisture, or a surface chilled by outdoor conditions. A warm breaker may be heavily loaded, poorly connected, warmed by a neighboring component, or simply operating differently from the unloaded breakers beside it.
Good thermography compares like with like. Scan similar components under similar loads. Photograph the visible scene from the same position. Record indoor and outdoor temperatures, weather, solar exposure, HVAC state, equipment load, and anything that changed between images.
For building-envelope work, thermal cameras perform better when the indoor and outdoor temperatures differ enough to create a useful signal. Winter mornings and evenings are often productive because solar heating is limited and the building envelope has a clear temperature gradient. Wind, rain, and recent sun can erase or manufacture patterns.
Specifications that matter when choosing a thermal camera
Native thermal resolution
Native thermal resolution is the physical detector’s pixel count. A 160 × 120 detector contains 19,200 thermal pixels. More native pixels generally provide more detail and give a small or distant target more detector coverage.
Several thermal cameras advertise an enhanced output resolution that is much larger than the detector. TOPDON calls its processing TISR. FLIR uses terms such as VividIR or Super Resolution on some models. These features can produce a cleaner output image, but software processing does not add physical detector pixels.
MSX is different again. FLIR’s MSX system adds visible-camera edge detail to the thermal image so labels, outlines, and objects are easier to recognize. That context is useful. It is not additional thermal resolution.
A low-resolution detector can still be useful when you can stand close to a broad wall, duct, tank, or motor housing. Small electrical parts, distant roof areas, narrow tubing, and subtle building patterns benefit from more native pixels. FLIR’s thermal-camera specification guide notes that smaller or more distant targets require higher resolution.
Thermal sensitivity or NETD
Noise Equivalent Temperature Difference, usually shortened to NETD, describes the smallest temperature difference the camera can distinguish. Lower is better when the values were measured under comparable conditions, as explained in FLIR’s guide to thermal-camera specifications.
A camera rated near 40 mK can display subtler differences than one rated near 70 mK under the same test conditions. That matters for weak moisture patterns, framing, small insulation irregularities, and other scenes where temperatures differ by very little. Large hot bearings and broad heat-loss patterns are less demanding.
Do not compare NETD numbers blindly. Manufacturers may test at different reference temperatures or use different methods. Detector resolution, optics, focus, image processing, target distance, environmental conditions, and operator technique still affect the result.
Focus and measurement distance
An out-of-focus thermal image is not merely ugly. It can blend the target with its surroundings and corrupt the apparent temperature. FLIR states that an in-focus image is required for accurate measurement.
Fixed-focus thermal cameras are convenient for general inspections. Manual or automatic focus provides more control when targets vary greatly in distance or size. Whatever the design, move close enough for the target to occupy sufficient detector pixels while maintaining safe clearance.
Refresh rate and temperature range
A 25 Hz refresh rate produces smoother movement than an 8.7 or 9 Hz camera. That can make scanning equipment, animals, or a large building route feel more natural. A slower refresh rate remains usable for stationary walls, ceilings, panels, and machinery.
Temperature range matters only when it matches the work. A homeowner looking for heat loss does not need a 1,022°F ceiling, while someone checking high-temperature industrial equipment might. Range should not distract from native resolution, sensitivity, focus, reporting, and safe working distance.
Phone attachment or standalone handheld
Phone attachments are compact and use the phone’s screen, storage, and processing. They can be a good value, but compatibility is exacting. Check USB-C versus Lightning, phone model, operating system, case clearance, app support, and whether the attachment draws power from the phone.
Standalone thermal cameras preserve phone battery, work more easily with gloves, and keep inspection files separate from personal photos. Better handhelds add visible cameras, annotations, Wi-Fi transfer, cloud storage, and report software. They cost more and become another battery to maintain.
Compare thermal cameras as complete inspection workflows rather than isolated sensors. The best thermal cameras fit the target size, working distance, documentation needs, and frequency of use.
Prepare the scene before scanning
Thermal cameras respond to conditions at the moment of the scan. For insulation and draft work, establish a useful indoor/outdoor temperature difference and avoid recent solar loading. Record wind and precipitation. If possible, scan the same route before and during controlled depressurization so you can separate air-leak patterns from conductive patterns.
Thermal cameras need a controlled scene when small differences matter. When thermal cameras are used at different times, record enough environmental detail to explain why the images may have changed.
Air leaks often appear as streaks or plumes on the surfaces reached by incoming air. The camera is not photographing air. It is photographing the surface temperature change caused by that air. Scan windows, doors, attic hatches, outlets, wall-to-floor joints, ceiling penetrations, and utility entries in an orderly route.
Emissivity complicates temperature readings. Flat paint and many building materials emit infrared energy well, while polished copper and aluminum can behave like mirrors. FLIR’s emissivity guidance warns that low-emissivity surfaces may reflect the operator, sky, lights, or nearby machinery instead of accurately reporting the target.
Change your viewing angle when a suspicious shape could be a reflection. If the hot spot moves as you move, it probably is not attached to the component. For quantitative work on shiny metal, use an approved high-emissivity target or another suitable method and follow trained procedures.
Save both a thermal image and an ordinary photograph. Note the room, component, date, camera settings, weather, operating condition, and any confirmation test. Six months later, a glowing orange rectangle called `IR_0042.jpg` is not a maintenance record. It is a tiny mystery.
Top 5 thermal cameras
These thermal cameras cover phone-based spot checks, simple handheld surveys, organized building inspections, and professional reporting.
1. TOPDON TC001 Mini – best budget USB-C phone attachment
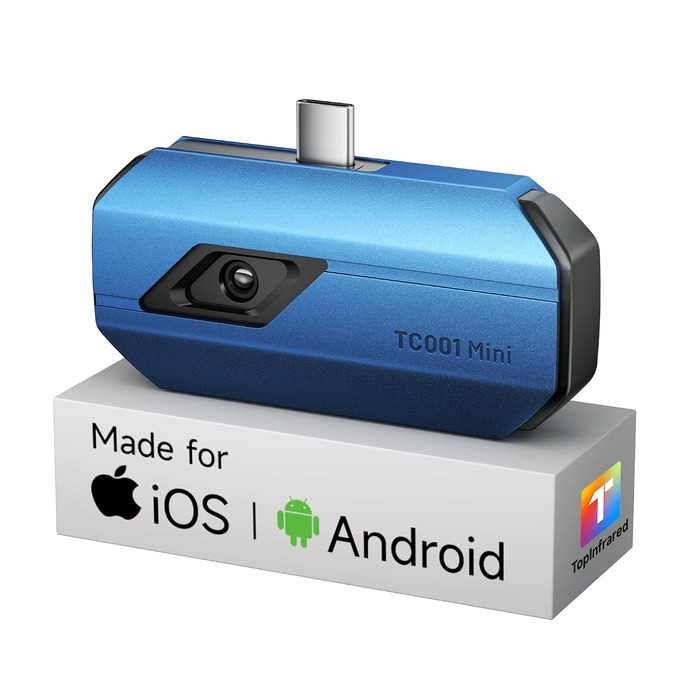
The TOPDON TC001 Mini is the lowest-cost entry point in this group of thermal cameras. It plugs into compatible USB-C devices and uses TOPDON’s mobile software for live imaging, measurement tools, alarms, and image capture.
Its physical detector is 96 × 96, while the title advertises 384 × 384 TISR output. That distinction should stay visible. The processed image may look cleaner, but the scene begins with 9,216 native thermal pixels.
TOPDON lists thermal sensitivity at no more than 40 mK and a 25 Hz refresh rate. Those are useful specifications for a small attachment at this tier. The listed temperature range extends from -4°F to 1,022°F, though most home-energy work occupies a much narrower band.
The TC001 Mini does not list an onboard visible camera. Use the phone’s ordinary camera to document the matching scene. The included extension cable may help with tight equipment or awkward phone cases, but buyers should confirm their exact phone, tablet, computer, connector, operating system, and app support before ordering.
Choose this model for broad walls, ducts, pipes, tanks, weatherization checks, and close equipment comparisons on a modest budget. Move closer when inspecting small components because the native detector is limited.
Key Advantages
- Low-cost entry to radiometric thermal imaging
- 25 Hz listed refresh rate
- Thermal sensitivity listed at no more than 40 mK
- Compact USB-C attachment with extension cable
2. FLIR ONE Pro USB-C for iPhone – best professional phone workflow
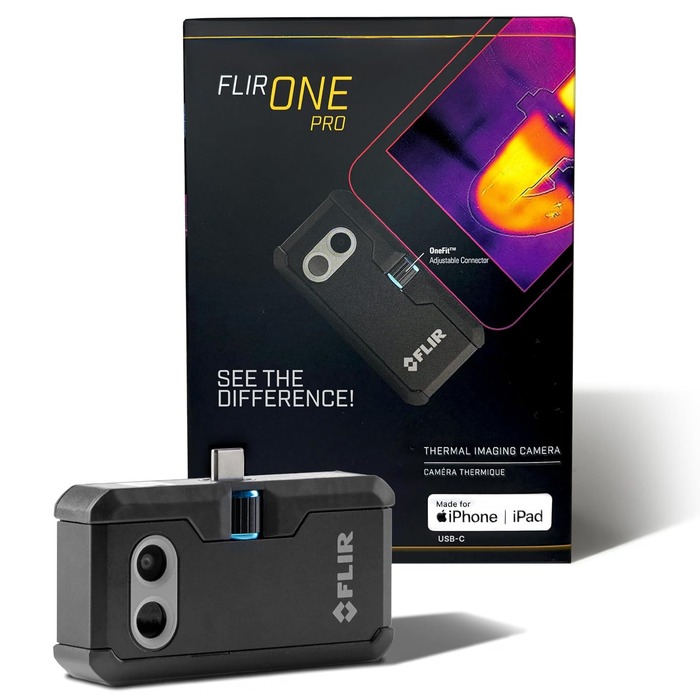
The FLIR ONE Pro is the stronger phone attachment for users who value visual context, radiometric files, and FLIR’s app ecosystem. This exact ASIN is for USB-C iPhones, specifically iPhone 15 and newer. It is not the Lightning or Android version.
Its native thermal detector is 160 × 120. FLIR advertises 480 × 360 VividIR or Super Resolution output, while the visible camera supplies edge detail for MSX. The native detector, processed output, and visible overlay are three separate things.
The listed thermal sensitivity is 70 mK, and the refresh rate is 8.7 Hz. TOPDON’s small attachment lists a lower NETD and faster refresh rate, but the FLIR brings more native thermal pixels, a visible camera, MSX, radiometric JPEG files, video, and a mature inspection workflow.
Connector compatibility is the trap here. Check the exact iPhone model, USB-C port, case clearance, current FLIR ONE app requirements, and operating-system support. A FLIR ONE Pro with the wrong connector is an expensive pocket ornament with excellent branding.
Choose this model for repeat home inspections, HVAC work, documentation, and users already committed to a compatible USB-C iPhone. Buyers who do not want phone dependence should choose a self-contained handheld.
Key Advantages
- 160 × 120 native thermal detector
- Visible camera and MSX context
- Radiometric files and FLIR app workflow
- Compact professional attachment for compatible USB-C iPhones
3. TOPDON TC004 Mini – best entry-level handheld
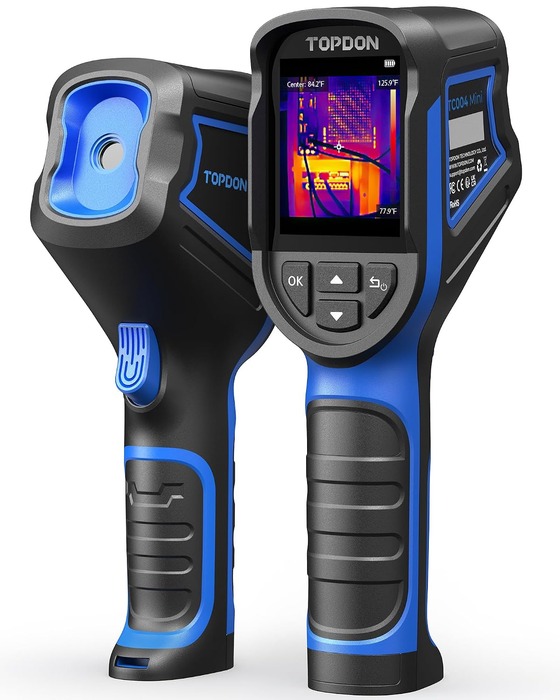
The TOPDON TC004 Mini is the straightforward handheld among these thermal cameras. It doesn’t rely on a phone, and its controls, battery, screen, and storage are dedicated to inspection work.
The detector is 128 × 128, while TOPDON advertises 240 × 240 TISR output. Listed sensitivity is below 40 mK and refresh rate is 25 Hz. That combination suits general building scans and equipment comparisons where a smooth image and subtle temperature differences matter more than visible-camera overlays.
The camera has 512 MB of internal memory, and the listing says it can store up to 8,000 thermal images. It can also capture an image when a temperature alarm triggers. No visible-light camera or formal report-generation suite is stated, so pair important thermal images with ordinary photos and written notes.
TOPDON lists IP54 protection, a 2-meter drop claim, and a one-year warranty. Those features make it more practical around shops, barns, mechanical rooms, and outdoor equipment than a phone dangling from a connector.
Choose the TC004 Mini when you want a simple handheld for recurring checks without paying for cloud storage, dual cameras, or contractor reporting. Choose the FLIR C5 when image organization and visible context matter more.
Key Advantages
- Self-contained handheld design
- 128 × 128 native thermal detector
- Below-40-mK listed sensitivity and 25 Hz refresh rate
- Internal storage and temperature-alarm capture
4. FLIR C5 – best pocket camera for building documentation
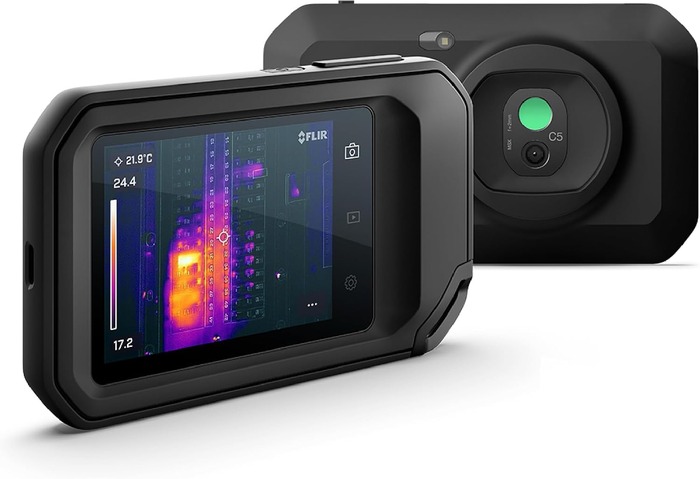
The FLIR C5 is designed for inspectors and maintenance workers who need more than a hot-and-cold picture. Its 160 × 120 thermal detector works with a 5-megapixel visible camera and MSX to make components and building details easier to recognize.
FLIR lists thermal sensitivity below 70 mK and an 8.7 Hz refresh rate. Those numbers are less aggressive than TOPDON’s small handheld on paper. The C5 earns its place through the complete workflow: more than 5,000 image sets, radiometric JPEGs, text annotations, Wi-Fi, FLIR Ignite cloud service, and Thermal Studio Starter.
The camera is compact enough for a pocket, with IP54 and 2-meter drop claims. Its fixed-focus design is convenient for common building distances. Users still need to respect the minimum focus distance and make sure a small target occupies enough thermal pixels.
MSX helps identify studs, breakers, pipe fittings, and equipment outlines. It does not add thermal pixels or prove what caused an anomaly. Keep the raw temperature pattern, visible context, environmental conditions, and confirmation results together.
Choose the C5 for property inspections, maintenance routes, HVAC documentation, and readers who need organized records without stepping up to the E6 Pro. Occasional homeowners may find the TC004 Mini or a phone attachment better value.
Key Advantages
- 160 × 120 native thermal detector
- 5-megapixel visible camera with MSX context
- Radiometric JPEGs, annotations, Wi-Fi, and cloud workflow
- Pocket-size IP54 design
5. FLIR E6 Pro – best for professional inspections and reporting
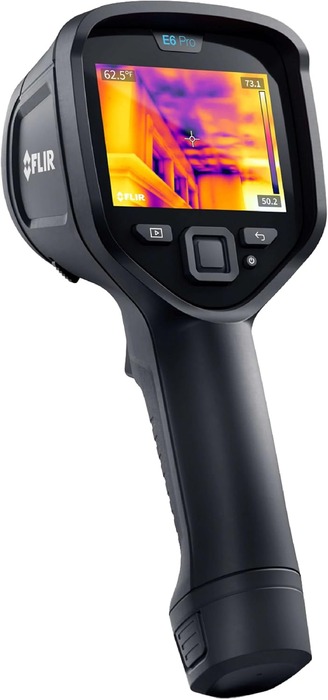
The FLIR E6 Pro is the premium choice in this lineup of thermal cameras. Its native detector is 240 × 180, giving it 43,200 thermal pixels. That is more than twice the native pixel count of the 160 × 120 FLIR models.
FLIR lists thermal sensitivity below 50 mK at 30°C and a 9 Hz refresh rate. The camera also includes a 5-megapixel visible camera, MSX, internal storage, image notes, Wi-Fi upload to FLIR Ignite, support for Thermal Studio, and USB radiometric streaming.
The higher native resolution helps with distant building areas, smaller components, and reports where detail matters. The camera still needs correct focus, target size, emissivity settings, environmental control, and interpretation. Expensive thermal cameras can still produce expensive nonsense when pointed at reflections.
This tier makes sense for paid energy auditing, facility management, electrical or mechanical maintenance by qualified personnel, and repeat inspection routes. A homeowner scanning one attic and three windows won’t recoup the extra cost through additional orange rectangles.
Choose the E6 Pro when measurement, documentation, image detail, and reporting are part of regular work. FLIR recommends periodic professional calibration when quantitative readings carry weight; calibration compares the instrument against known standards and documents drift.
Key Advantages
- 240 × 180 native thermal detector
- Below-50-mK listed sensitivity at 30°C
- Visible camera, MSX, notes, cloud upload, and report support
- Strongest fit here for paid or repeat professional inspection
All five thermal cameras can reveal useful patterns when the target and conditions suit their specifications. Choose thermal cameras for the work you will repeat, not the most dramatic processed image on a product page.
Use thermal cameras without inventing a diagnosis
Insulation and air leakage
Thermal cameras can show colder or warmer surface patterns at framing, attic hatches, rim joists, exterior corners, outlets, doors, windows, and ceiling penetrations. Scan systematically and, when possible, compare the same location under different pressure conditions.
Thermal cameras work best for envelope surveys when indoor and outdoor conditions create a stable temperature difference. Use thermal cameras before and during depressurization when a qualified blower-door procedure is available.
A pattern that appears or becomes stronger during depressurization supports an air-leak interpretation. A pattern that remains may involve insulation, thermal bridging, moisture, or another condition. Confirm with visual inspection, blower-door testing, smoke under controlled conditions, or a qualified energy auditor.
A home weather station can document outdoor conditions over time, but use official procedures and suitable indoor measurements for an energy audit. A temperature difference is useful only when you understand solar exposure, wind, rain, HVAC operation, and pressure.
Moisture clues
Thermal cameras do not detect water directly. Evaporation, thermal storage, and conductivity can create cooler or warmer surface patterns, but air leaks, missing insulation, and sun exposure can look similar. FLIR recommends confirming moisture-like patterns with a moisture meter.
Thermal cameras can narrow the search area, but the follow-up instrument confirms whether moisture is actually present.
Scan suspected areas from multiple angles and over time. Check plumbing, roofing, flashing, grading, condensation, and indoor humidity. Don’t cut a wall open just because the palette produced an ominous purple patch.
Electrical systems
A thermal camera can document temperature differences on safely visible electrical equipment. Compare similar components under similar loads and record the load condition. A hot connection is an anomaly that deserves investigation, not proof of a loose lug, overload, corrosion, or failing breaker.
Do not remove energized-panel covers, touch components, defeat guards, or approach arc-flash hazards unless you are qualified, trained, and properly equipped. InterNACHI advises reporting wet, heavily rusted, buzzing, arcing, or otherwise unsafe panels, but not opening or touching them.
Readers planning resilient power systems can compare our guides with those on gas-powered generators and portable solar panels. Thermography can support maintenance, but it does not replace electrical testing, shutdown procedures, service manuals, or qualified repair.
Motors, pumps, bearings, and homestead equipment
Equipment should operate under a representative load before a thermal comparison. Fluke recommends at least 40% load for preventive-maintenance imaging because lightly loaded components may not develop enough heat to expose a problem.
Create baseline images when equipment is known to be working normally. Repeat the same route with similar load, distance, angle, emissivity setting, and weather. Wind can cool a hot component, direct sun can heat a housing, and reflective metal can display the surroundings.
Thermal cameras become more useful when each survey can be compared with an earlier one. Baseline images from thermal cameras should preserve the component location, load, viewing angle, and relevant settings.
Thermal cameras can help locate a warmer bearing, uneven motor housing, restricted flow, belt friction, or an abnormal electrical connection. The image does not identify the mechanical cause. Follow with safe inspection, vibration, current, pressure, flow, lubrication, alignment, or other appropriate checks.
Radiant floors, livestock buildings, and pests
Radiant heating tubes or elements can create recognizable surface patterns. Cold gaps or uneven lines show where to investigate. Floor coverings, furniture, screed thickness, adhesive, flow, controls, and response time can all alter the image.
In barns and animal housing, thermal cameras can help compare drafts, insulation, waterers, ventilation patterns, and safely visible equipment. They should not be used to diagnose animal health or replace veterinary examination.
A long-occupied nest may alter a wall or ceiling surface temperature, but the camera cannot see an animal moving behind the material. Confirm pest evidence through appropriate inspection rather than announcing that the blue blob is definitely a raccoon with architectural ambitions.
Which thermal camera should you buy?
The TOPDON TC004 Mini is the best overall value for most homestead owners. It is self-contained, offers good sensitivity and a smooth 25 Hz refresh rate, stores thousands of images, and avoids phone-connector problems. Its 128 × 128 detector is enough for broad building surfaces and close equipment checks when technique is sound.
Choose the TOPDON TC001 Mini when cost and portability matter most, and you already own a compatible USB-C device. The FLIR ONE Pro is the better phone attachment for compatible newer iPhones when MSX, radiometric files, and FLIR’s software workflow justify the added cost.
The FLIR C5 is the practical step up for inspectors and maintenance workers who need visible context, annotations, Wi-Fi, and organized image sets. The E6 Pro belongs with professionals who benefit from its 240 × 180 detector and reporting workflow often enough to justify the price.
None of these thermal cameras will replace a blower door, moisture meter, multimeter, qualified electrician, HVAC technician, building scientist, or experienced mechanic. The camera narrows the search. Good evidence and safe confirmation finish it.
Compare thermal cameras by the decisions their images must support, then budget for the training and confirmation tools those decisions require. For most buyers comparing thermal cameras, consistent technique will improve results more than a small specification advantage.
Build an inspection record you can compare later
Use a repeatable route. Save thermal and visible images from similar positions. Record the date, room, component, indoor and outdoor temperatures, weather, operating load, palette, range, emissivity setting, distance, and any pressure-test condition.
Name files so another person can find the same target. `Barn_WellPump_Motor_Loaded_2026-11-18` is useful. `IMG_9827` is how maintenance history becomes folklore.
For off-grid properties, our guide to portable solar panels for off-grid living covers the broader power system. Use thermal images as one part of a maintenance program and keep electrical work within the equipment instructions and the limits of your qualifications.
Amazon Disclosure
As an Amazon Associate, I earn from qualifying purchases.